You can maintain Service Groups, Surcharges, and Markup Items through Excel files in techSHIP.
This guide covers exporting your configuration, preparing each workbook, validating your changes, and applying the import.
 | For detailed conceptual information and advanced configuration, refer to Understanding Markup Profiles in techSHIP [Guide]. | |
| | ||
TABLE OF CONTENTS
Before You Begin
Start from an existing Markup Profile, using the Availability and Access guidance in Understanding Markup Profiles in techSHIP [Guide] to access the correct module. To locate or create a profile, refer to How to Configure and Manage Markup Profiles in techSHIP [Step-by-Step Guide].
Make sure you have permission to perform the action. For each import, prepare one .xls or .xlsx file with a maximum size of 10 MiB.
| Keep an unmodified copy of your exported files before making changes. Your profile-level export contains Service Groups and Surcharges, but not every group’s matrix values. Export the affected groups’ Markup Items separately; do not treat the profile workbook as a complete backup of the configuration. | |
| | ||
Service Groups and Surcharges
Use the Actions menu on the profile’s detail page to export and import Service Groups and Surcharges together.
Export Service Groups and Surcharges
 | Open the Markup Profile you want to export. |
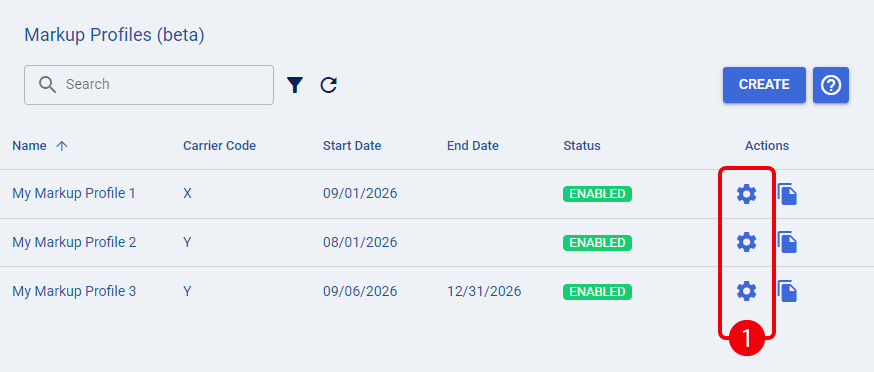
 | Select Actions → Export in the profile header. |

Save Service Groups - {profile}.xlsx, where {profile} represents the selected profile’s name.
You now have a workbook containing the Service Groups and Surcharges sheets. The default Other group, identified by code OTHER, is excluded from this export. Continue with Prepare the Profile Workbook to make your changes.
Prepare the Profile Workbook
Work on a copy of the exported workbook, and preserve its sheet names and column headers.
In the Service Groups sheet, prepare your changes using the following columns:
- Code: Enter a code of up to 32 characters, unique within the file. Keep the existing code when updating a group; use a new code when creating a group. Matching is case-insensitive.
- Name: Enter the group name, using up to 255 characters.
- Services: Include the complete Service membership you intend to retain for that group, following the format in the export. Do not assign the same Service to multiple imported groups. Leaving this cell empty removes all Services from the existing group.
- Pricing Dimension and Pricing Dimension Id: Reference an active Pricing Dimension available to your organization. When providing both its name and ID, make sure they identify the same record.
- Zone & Area and its ID column: Reference an active Zone & Area configuration available to your organization. Keep its name and ID consistent. For built-in zones, retain the exported ID (e.g., for the USPS Zone & Area, use ID -1).
- Markup Type: Retain the exported value unless you intend to change the group’s markup calculation type. Refer to Understanding Markup Profiles in techSHIP [Guide] when choosing the appropriate type.
- Minimum Markup: Enter a decimal value using a period as the decimal separator.
- Include Tax and Force Markup: Use TRUE or FALSE for each setting.
Do not add a Service Groups row with code OTHER; you cannot import the reserved default group. Rows with both Code and Name empty are ignored.
In the Surcharges sheet, use the exported columns to edit surcharge identification, markup settings, and dates:
- Surcharge Type, Carrier Surcharge Code, and Custom Name: Keep this combination unchanged when you intend to update the same surcharge, because the import uses these values to match the record.
- Text fields: Keep surcharge text within 255 characters per field.
- Start Date and End Date: Use YYYY-MM-DD. When you supply both dates, make sure End Date is on or after Start Date.
To leave all existing surcharges unchanged, omit the entire Surcharges sheet from your working copy.
After preparing your Service Groups and any Surcharges changes, save the workbook and continue with Import Service Groups and Surcharges.
Import Service Groups and Surcharges
 | Removing a Service Group, or changing its Pricing Dimension or Zone & Area through an import, deletes that group’s existing matrix values. Export the affected Markup Items first and review the maintenance consequences in Understanding Markup Profiles in techSHIP [Guide], especially when the profile is assigned to a Client (Billing) Account. | |
| | ||
| Open the destination Markup Profile and confirm that you are editing the intended profile. |
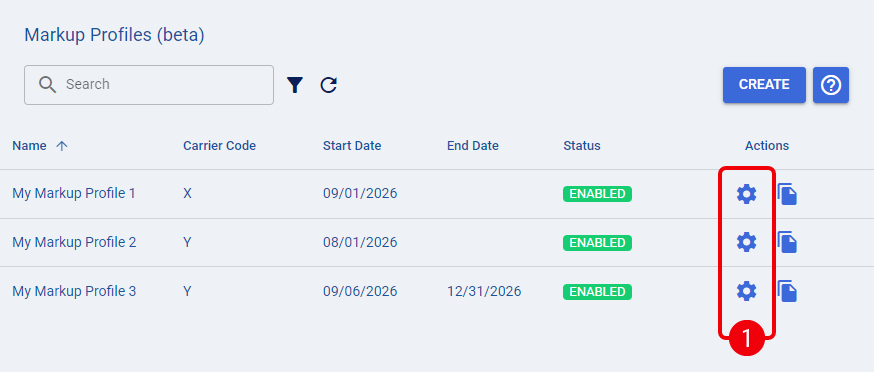
| Select Actions → Import. |

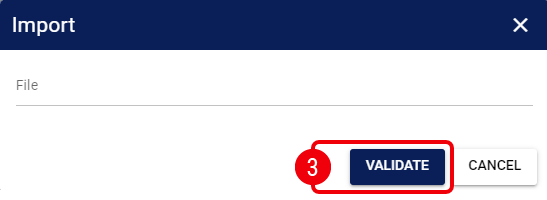
 | In the Import dialog, select your prepared workbook in File, then select Validate. |
 | Review the validation results and complete the removal selections before applying the import: |
- Proposed changes: Check the Service Group and Surcharge changes against your intended configuration.
- Omitted Service Groups: Select the removal checkbox only for groups you intend to delete. Leave a group unchecked to retain it unchanged.
- Removal warnings: Check which matrices will be removed. Deleting a selected group also returns its Services to Other.
- Blocking errors: Correct the workbook and validate the revised file before proceeding.
When no blocking errors remain and the proposed changes match your intention, select Import.
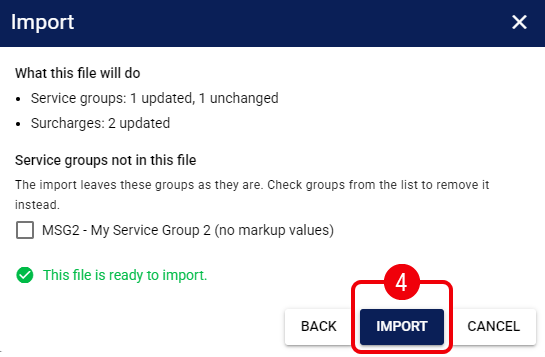
Your profile now reflects the successfully imported Service Group and Surcharge changes. Continue with Markup Items for any group whose matrix values need to be populated or replaced.
Markup Items
Use the Actions menu on an individual Service Group’s Markup values page to export and import that group’s matrix.
Export Markup Items
| Open the desired Markup Profile. |
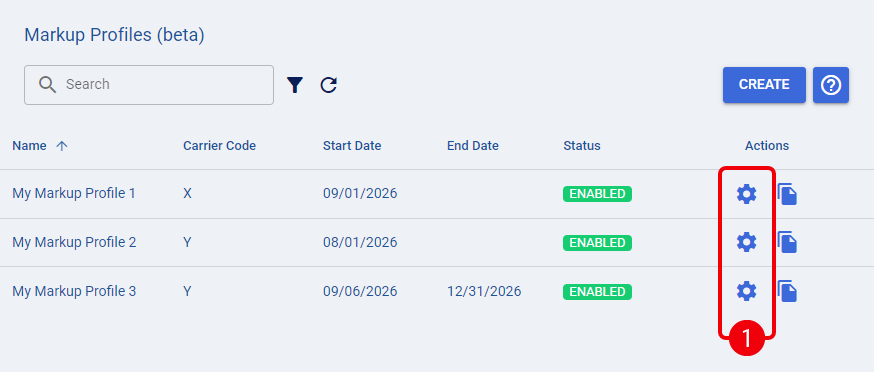
| Locate the targeted group and click on the Markup values icon. |
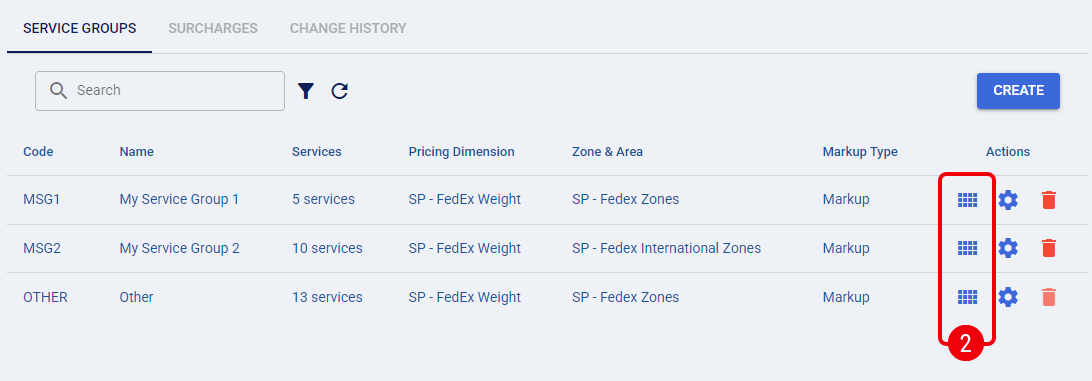
| On the matrix page, confirm the Service Group, Pricing Dimension, and Zone & Area shown in the header, then select Actions → Export. |

Save Markup Items - {group}.xlsx, where {group} represents the selected group’s name.
You now have a workbook containing a Markup Items sheet for the selected group. Keep an unmodified copy, then continue with Prepare the Markup Items Workbook.
Prepare the Markup Items Workbook
Preserve the Markup Items sheet name, the exported bracket labels, and the zone headers. Each bracket occupies a row, and each zone has three value columns:
- {Zone}-Percent: Enter a percentage from 0 through 100, inclusive, with no more than two decimal places.
- {Zone}-Fixed Amount: Enter a numeric value of zero or greater.
- {Zone}-Minimum Markup: Enter a numeric value of zero or greater.
Keep all three value columns for each zone. Do not replace numeric values with the grid’s display labels, such as — or Not defined; leave a value blank only when you intend to clear it. Retain every matrix value you want to preserve, including values you are not changing. Prepare the complete intended matrix rather than a file containing only a few changed cells.
Use only one row for each bracket. When a bracket appears more than once, the import uses its final occurrence. If you have changed the group’s Pricing Dimension or Zone & Area, start with a fresh export so your workbook reflects the current brackets and zones.
After reviewing the complete Markup Items sheet, save the workbook and continue with Import Markup Items.
Import Markup Items
| Importing Markup Items replaces values in the selected group’s current matrix. Blank cells clear the corresponding values; they do not mean “leave unchanged.” Export the current matrix first, and confirm that your workbook contains every value you intend to retain. | |
| | ||
| Open the desired Markup Profile. |
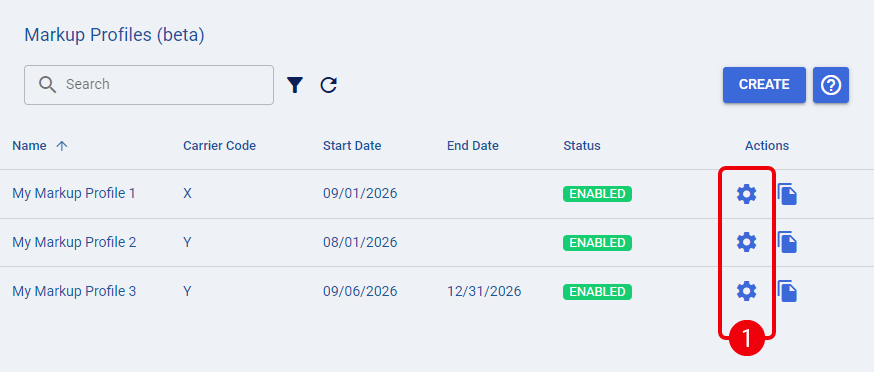
| Locate the targeted group and click on the Markup values icon. |
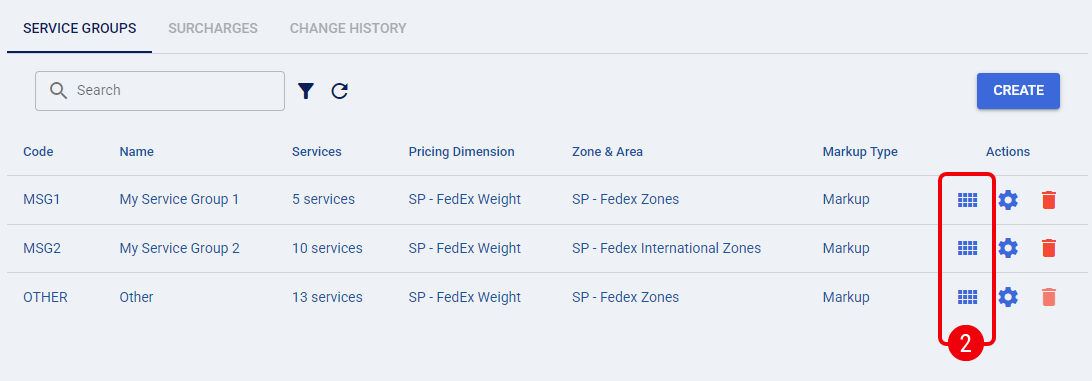
| Select Actions → Import. |

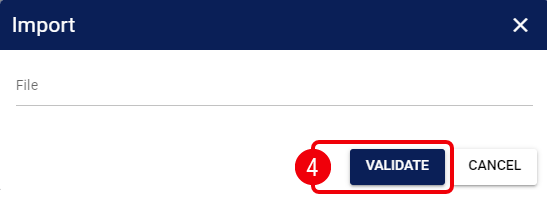
| In the Import dialog, select your prepared matrix workbook in File, then select Validate. |
 | Review the validation results before applying the import: |
- Warnings: Check any zones or brackets that do not match the current matrix. These entries are skipped. Continue only when those omissions are intentional; otherwise, correct the workbook and validate it again.
- Blocking errors: Check the sheet name, zone-column structure, bracket matches, and numeric values. Correct the workbook and validate the revised file before proceeding.
- Additional errors: Review the first 15 matrix errors on screen. Use Copy additional errors to copy further details and paste them into a text editor. Clipboard output is limited to 500 errors.
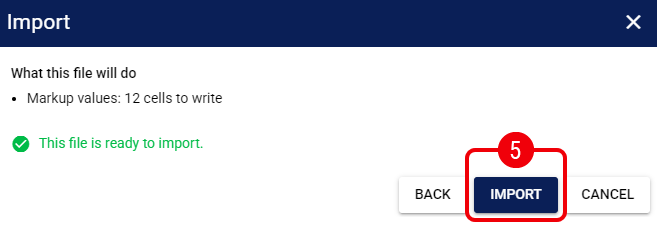
When no blocking errors remain and the results match your intended changes, select Import.
Your group now contains the successfully imported Markup Items. For individual adjustments directly in the grid, continue with How to Edit Markup Matrices in techSHIP [Step-by-Step Guide].
Was this article helpful?
That’s Great!
Thank you for your feedback
Sorry! We couldn't be helpful
Thank you for your feedback
Feedback sent
We appreciate your effort and will try to fix the article