This guide shows you how to review, enter, clear, and save markup matrix values for an existing Service Group in a Markup Profile.
TABLE OF CONTENTS
- Before You Begin
- Open and Review the Matrix
- Edit and Save Matrix Values
- Verify Your Changes
- Related Tasks
Before You Begin
Before you begin, make sure to read Understanding Markup Profiles in techSHIP [Guide] for a comprehensive explanation of how this feature works.
Additionally, make sure you have an existing Markup Profile and Service Group with a configured Pricing Dimension and Zone & Area, and that you have edit access to the configuration.
To locate or prepare the profile and group, follow How to Configure and Manage Markup Profiles in techSHIP [Step-by-Step Guide].
Open and Review the Matrix
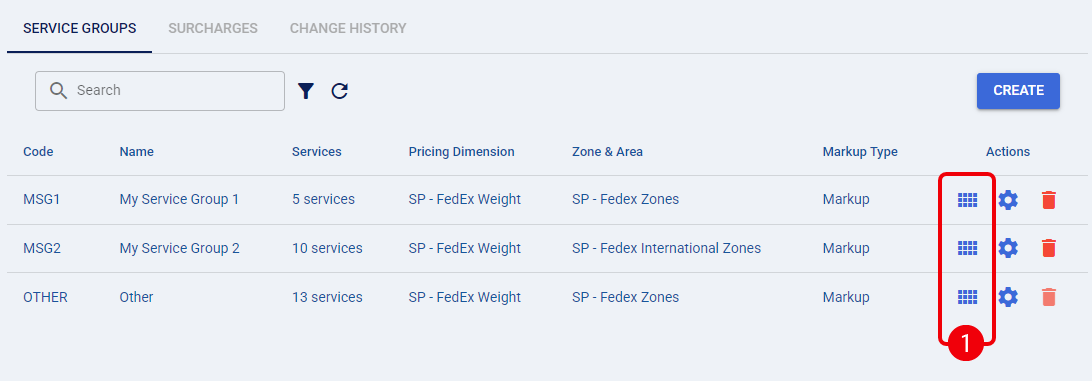
 | From your open Markup Profile, select the Service Groups tab, locate the group you need to update, and click on its Markup values icon. |
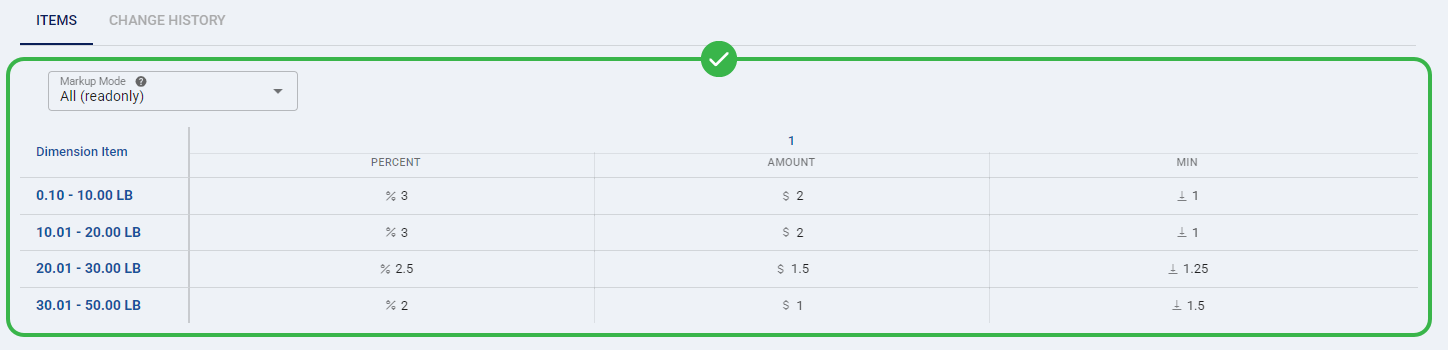
 | On the markup-values page, review the following header fields. Then select the Items tab and choose All (readonly) from Markup Mode to inspect the stored values. |
- Markup Profile, Service Group, and Code: Confirm that you opened the intended profile and group.
- Pricing Dimension and Zone & Area: Check the configuration used for the matrix’s brackets and zones.
- Markup Type: Review the group’s configured calculation type.
- Minimum Markup ($): Review the group-level minimum.
- Start Date and End Date: Review the profile’s effective dates.
- Use the Dimension Item labels to identify the brackets and their units of measure. Under each zone heading, review Percent, Amount, and Min. Undefined values appear as —.
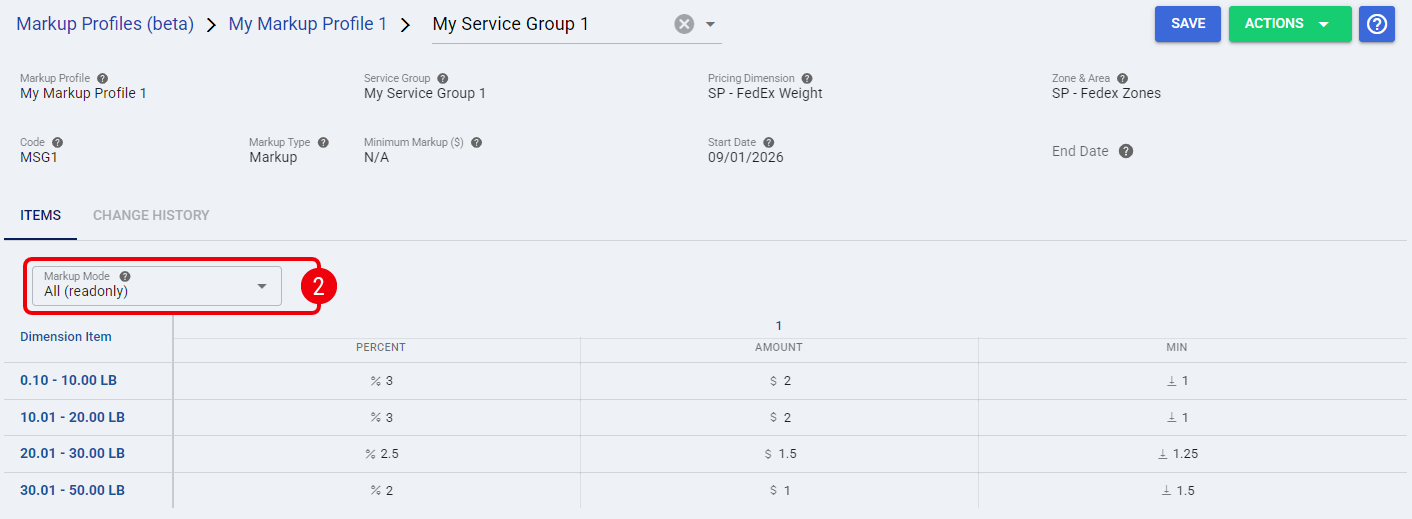
You have now identified the correct matrix and reviewed its stored values. Next, select the measure you need to edit.
Edit and Save Matrix Values
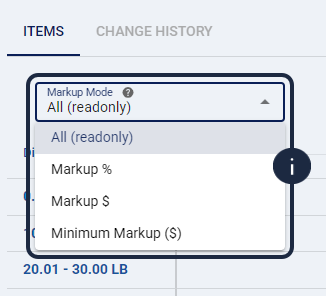
Use Markup Mode to choose which measure you edit across the grid:
- Markup %: Enter a percentage from 0 through 100, inclusive, for each bracket-and-zone combination you want to update.
- Markup $: Enter a fixed amount of 0 or greater.
- Minimum Markup ($): Enter a cell-specific minimum of 0 or greater.
For manual entry in this matrix editor, enter numbers with no more than two decimal places. Do not include currency symbols, percentage symbols, negative signs, or scientific notation.
 | Save your changes before switching Markup Mode or leaving the page. Confirming an unsaved-change prompt discards your pending edits. | |
| | ||
| Proceed on the Items tab, select the appropriate Markup Mode and update the values at the intersections of the applicable Dimension Item rows and zone columns. |
Enter or replace values as needed. To remove a value for the selected measure, use its clear icon (×) or delete its contents and leave the field blank.
| When you finish updating that measure, select Save in the upper-right corner. |
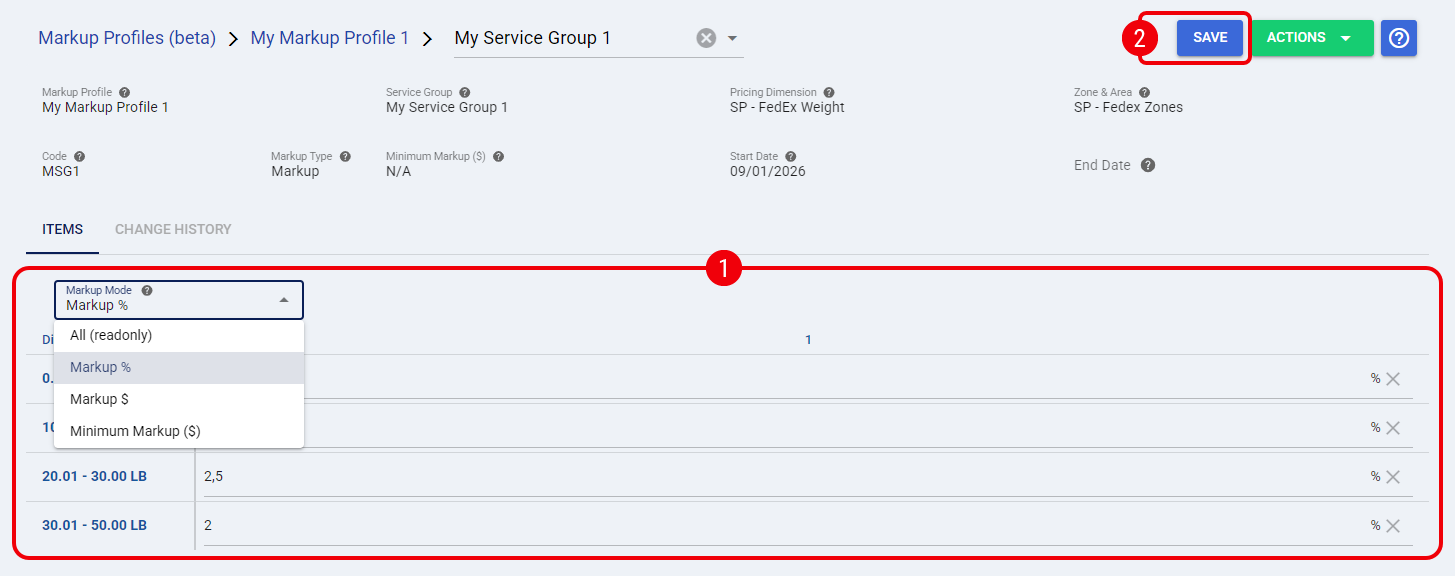
| When you select Save, you submit only the cells you changed. If any submitted value fails validation, none of the submitted changes are saved. | |
| | ||
After a successful Save, your changes are stored. Continue with Verify Your Changes, or repeat this procedure for another Markup Mode, saving before each switch.
Correct Validation Errors
If you receive a validation error, use the Service Group, bracket, and zone identified in the message to locate the affected cell. A failed cell validation includes “No values were saved.”
- Markup value must be a number. Replace the entry with a valid number, or clear the field when you intend to remove the value.
- Markup value cannot be negative. Enter 0 or a positive value, or clear the field.
- Markup percent must be between 0 and 100. Enter a percentage from 0 through 100, inclusive.
Correct the identified value, review your other pending edits, and select Save again. Once the save succeeds, continue with Verify Your Changes.
Verify Your Changes
To verify your changes, select All (readonly) from Markup Mode and review each updated Dimension Item and zone. Confirm the expected values under Percent, Amount, and Min. For values you cleared, confirm that you see —.
Related Tasks
To review recorded changes, open Change History on the group’s markup-values page and follow How to Review Change History Logs for Supported Entities [Step-by-Step Guide].
For spreadsheet-based maintenance, follow How to Import and Export Markup Profile Data in techSHIP [Step-by-Step Guide].
Was this article helpful?
That’s Great!
Thank you for your feedback
Sorry! We couldn't be helpful
Thank you for your feedback
Feedback sent
We appreciate your effort and will try to fix the article